

Before you begin
- Admin or app-authorization permissions in the Salesforce account you’re connecting
- At least one Target List with contacts or companies in it
- Admin or Marketer access to your 1eyeᴬᴵ workspace
Connect Salesforce
Connecting Salesforce happens inside a destination workflow, at the Destination node. Step 1: Open the Destination node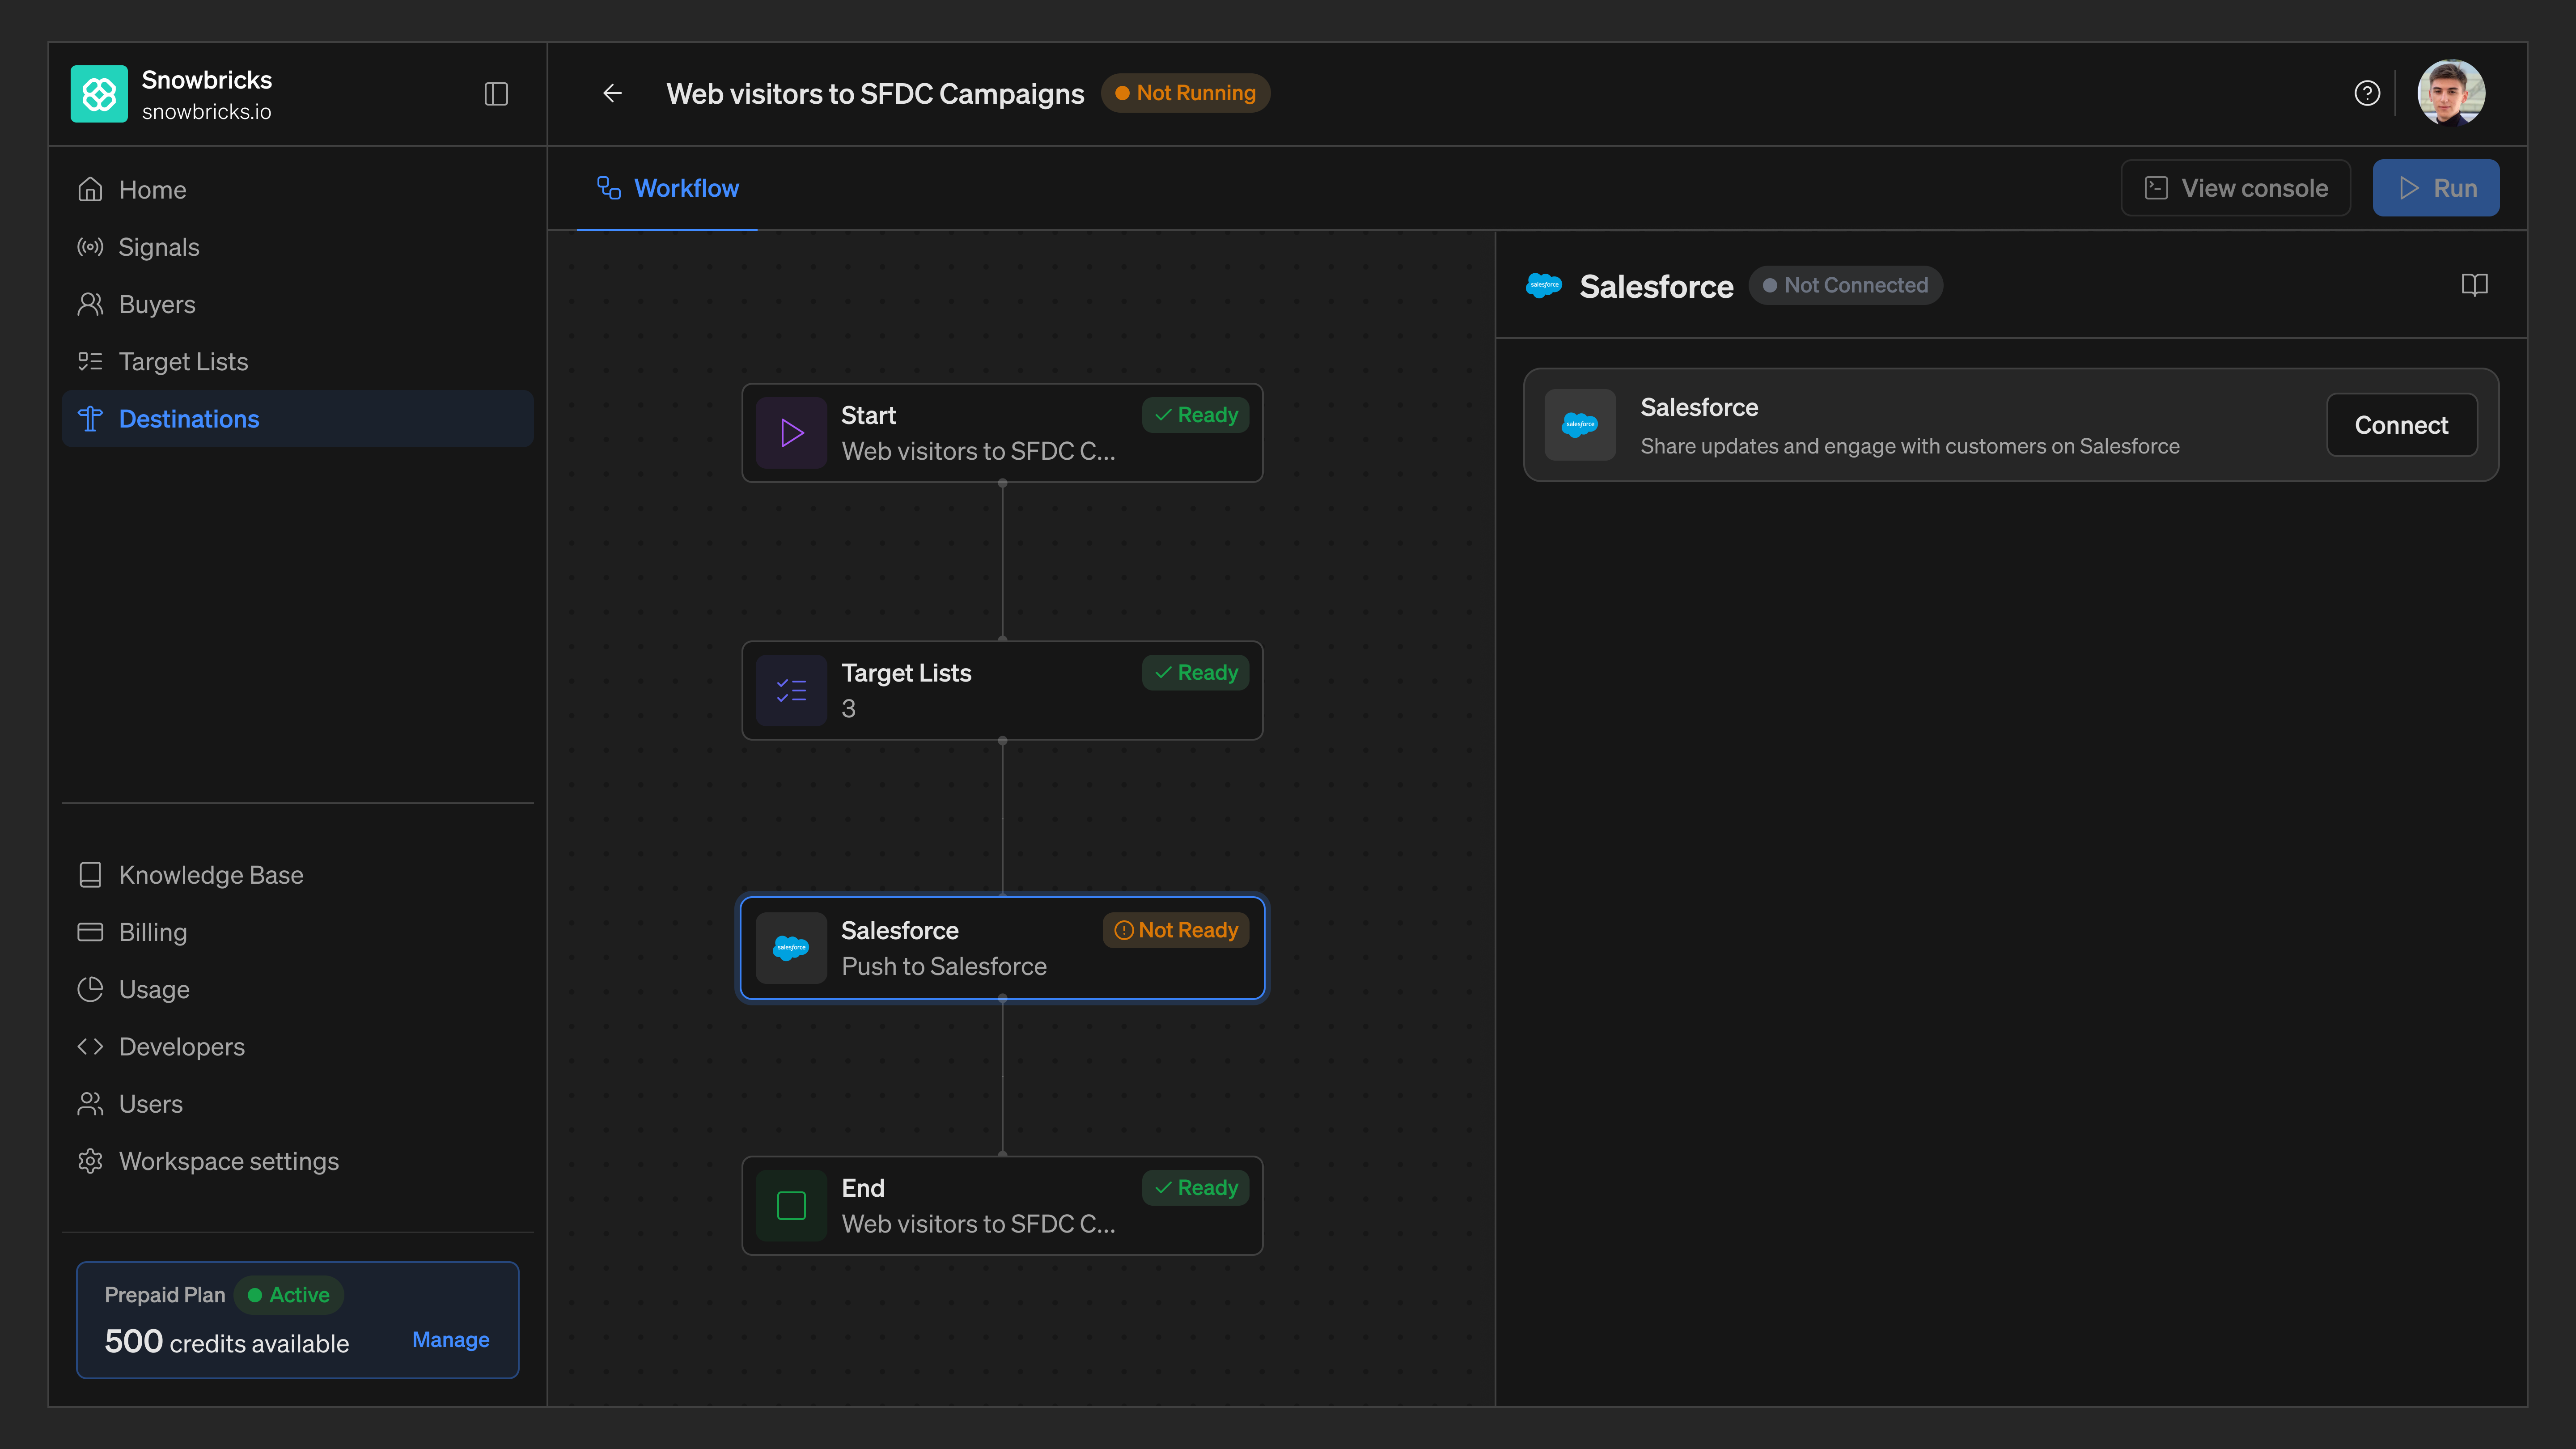
Salesforce · Not Connected [Connect]Select Connect. Step 2: Confirm the connection in 1eyeᴬᴵ
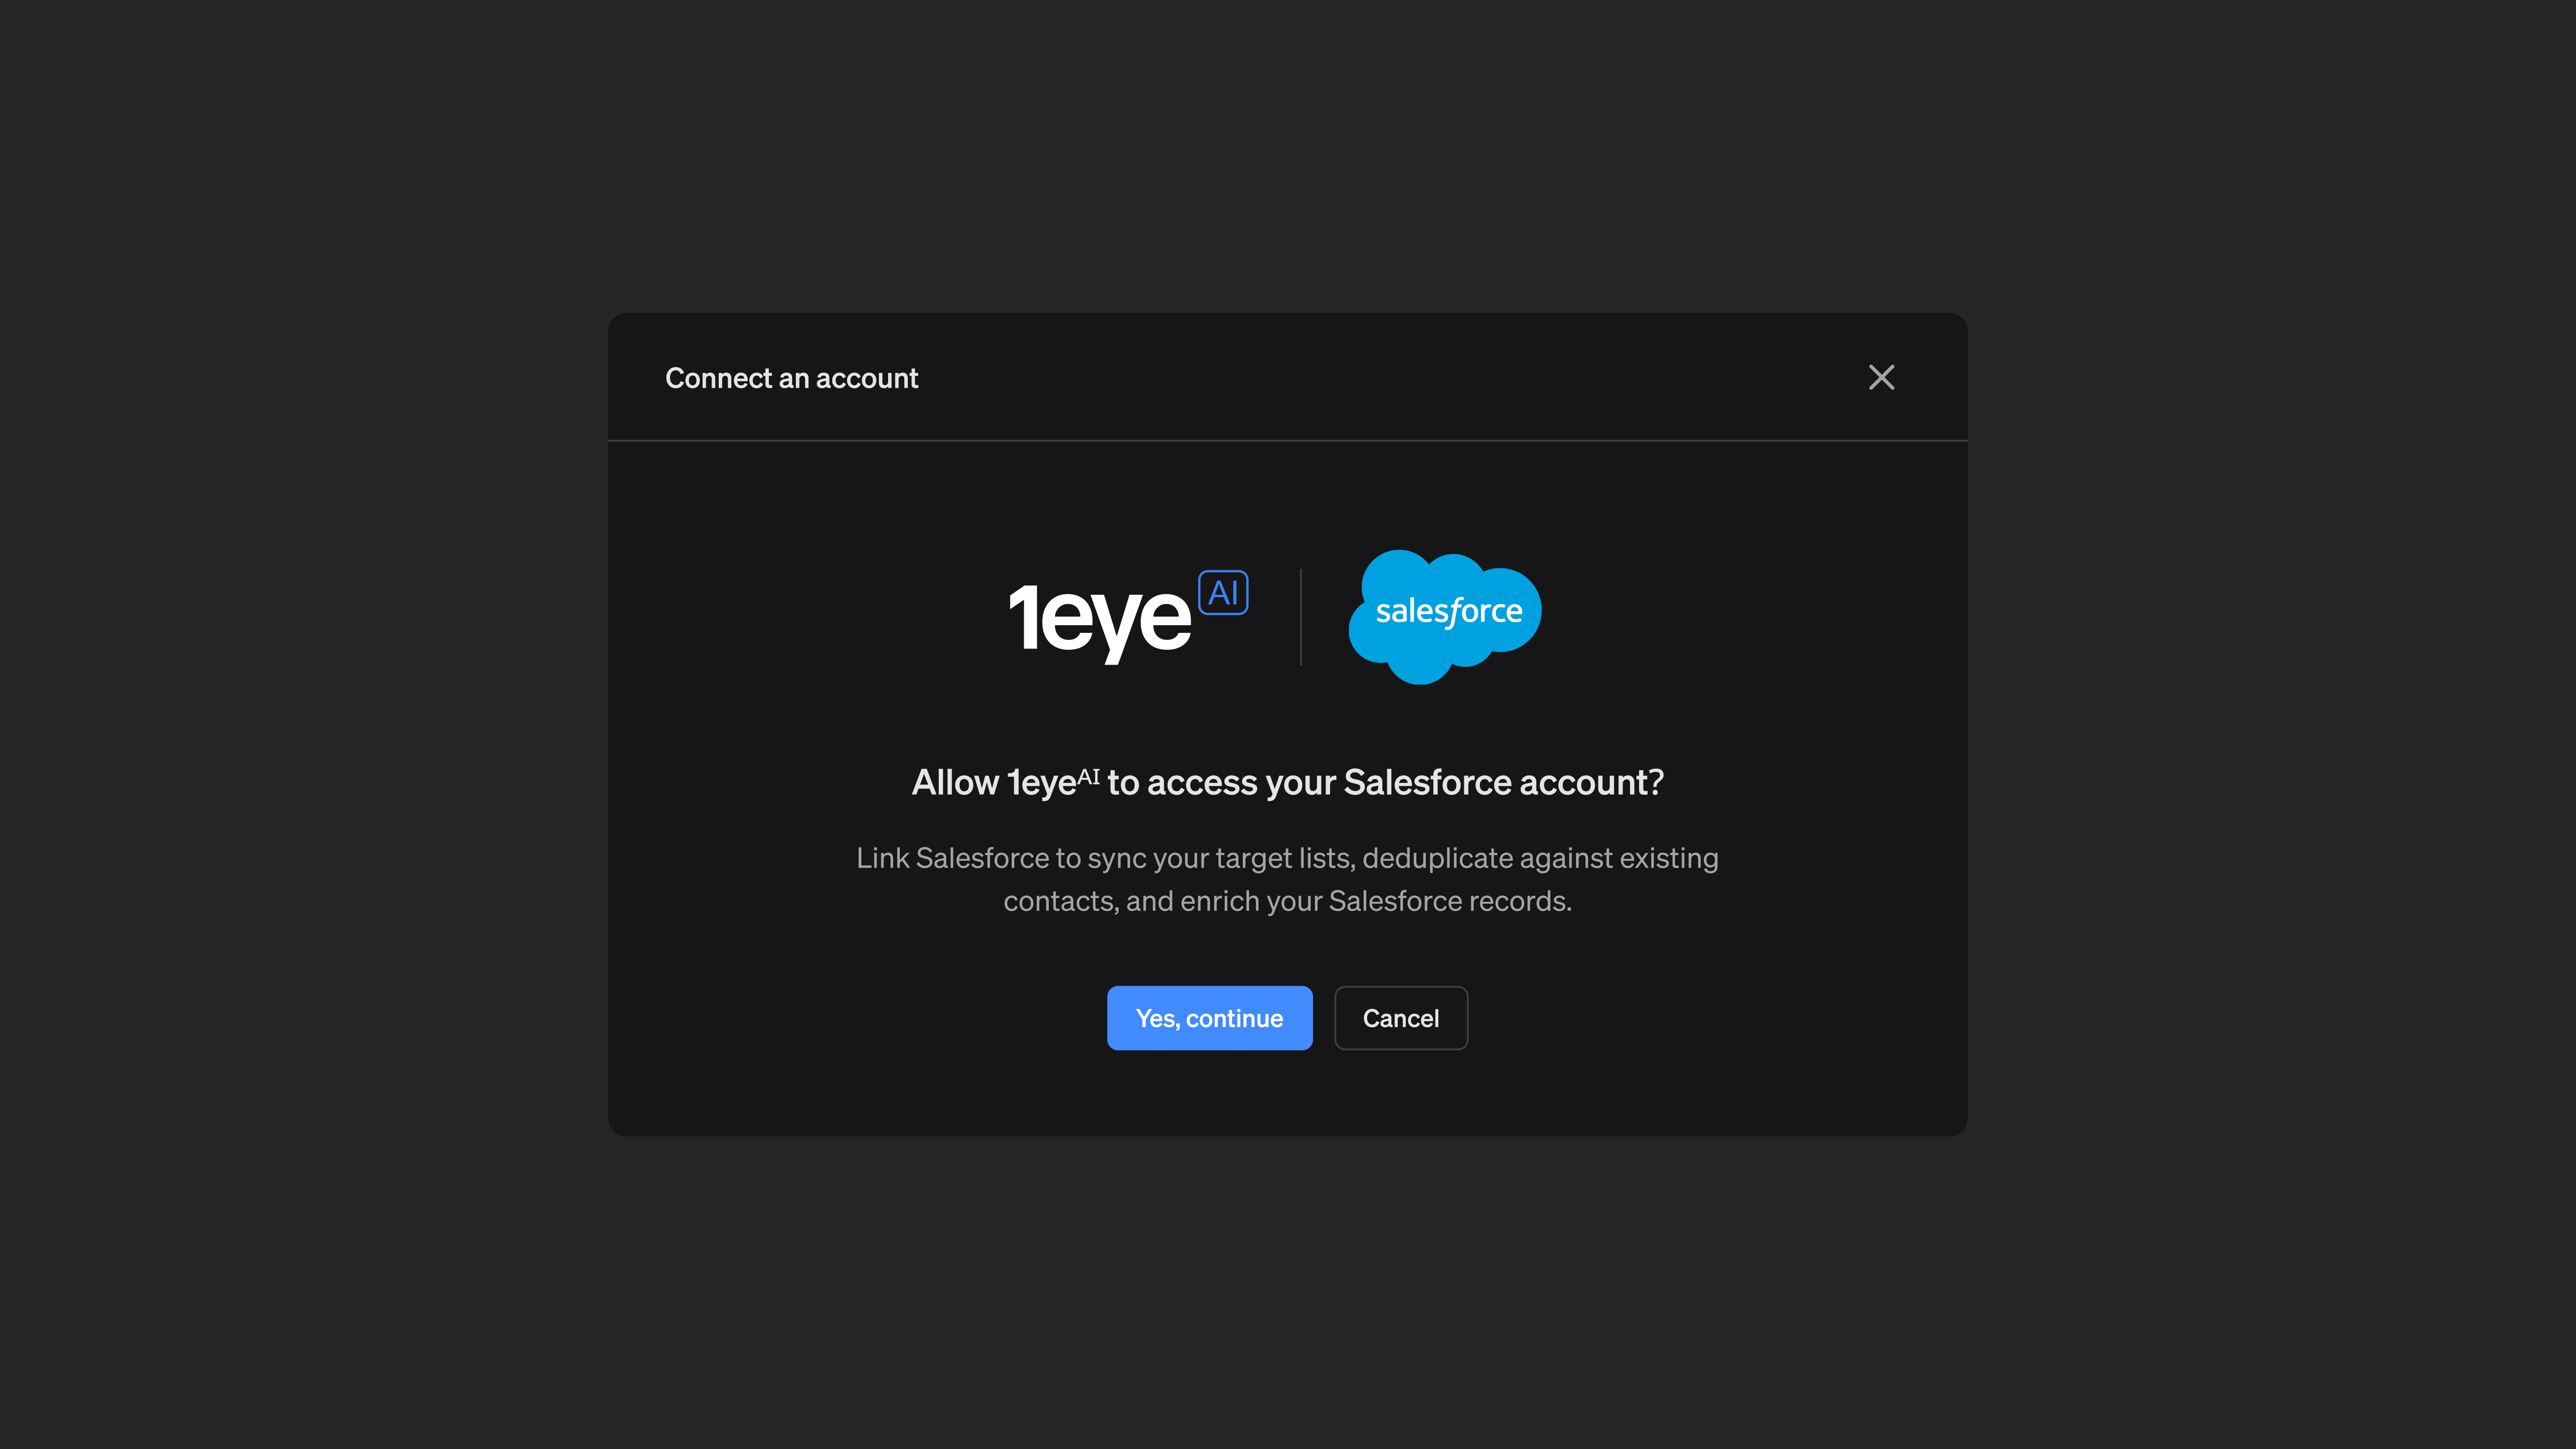
Allow 1eyeᴬᴵ to access your Salesforce account? Link Salesforce to sync your target lists, deduplicate against existing contacts, and enrich your Salesforce records.Select Yes, continue. Step 3: Continue to Salesforce Opens a Salesforce-hosted login screen in a new window. Select Log In if you already have an account. Step 4: Log in to Salesforce Enter your Salesforce username and password, or continue with SSO, then select Log In. This is Salesforce’s own secure login screen — your credentials are entered directly with Salesforce and never seen by 1eyeᴬᴵ. Step 5: Choose your Salesforce org, if prompted If you have access to more than one Salesforce org, choose the one that matches your 1eyeᴬᴵ workspace. Step 6: Review and allow access Review the permissions screen, then select Allow. Step 7: Connection confirmed
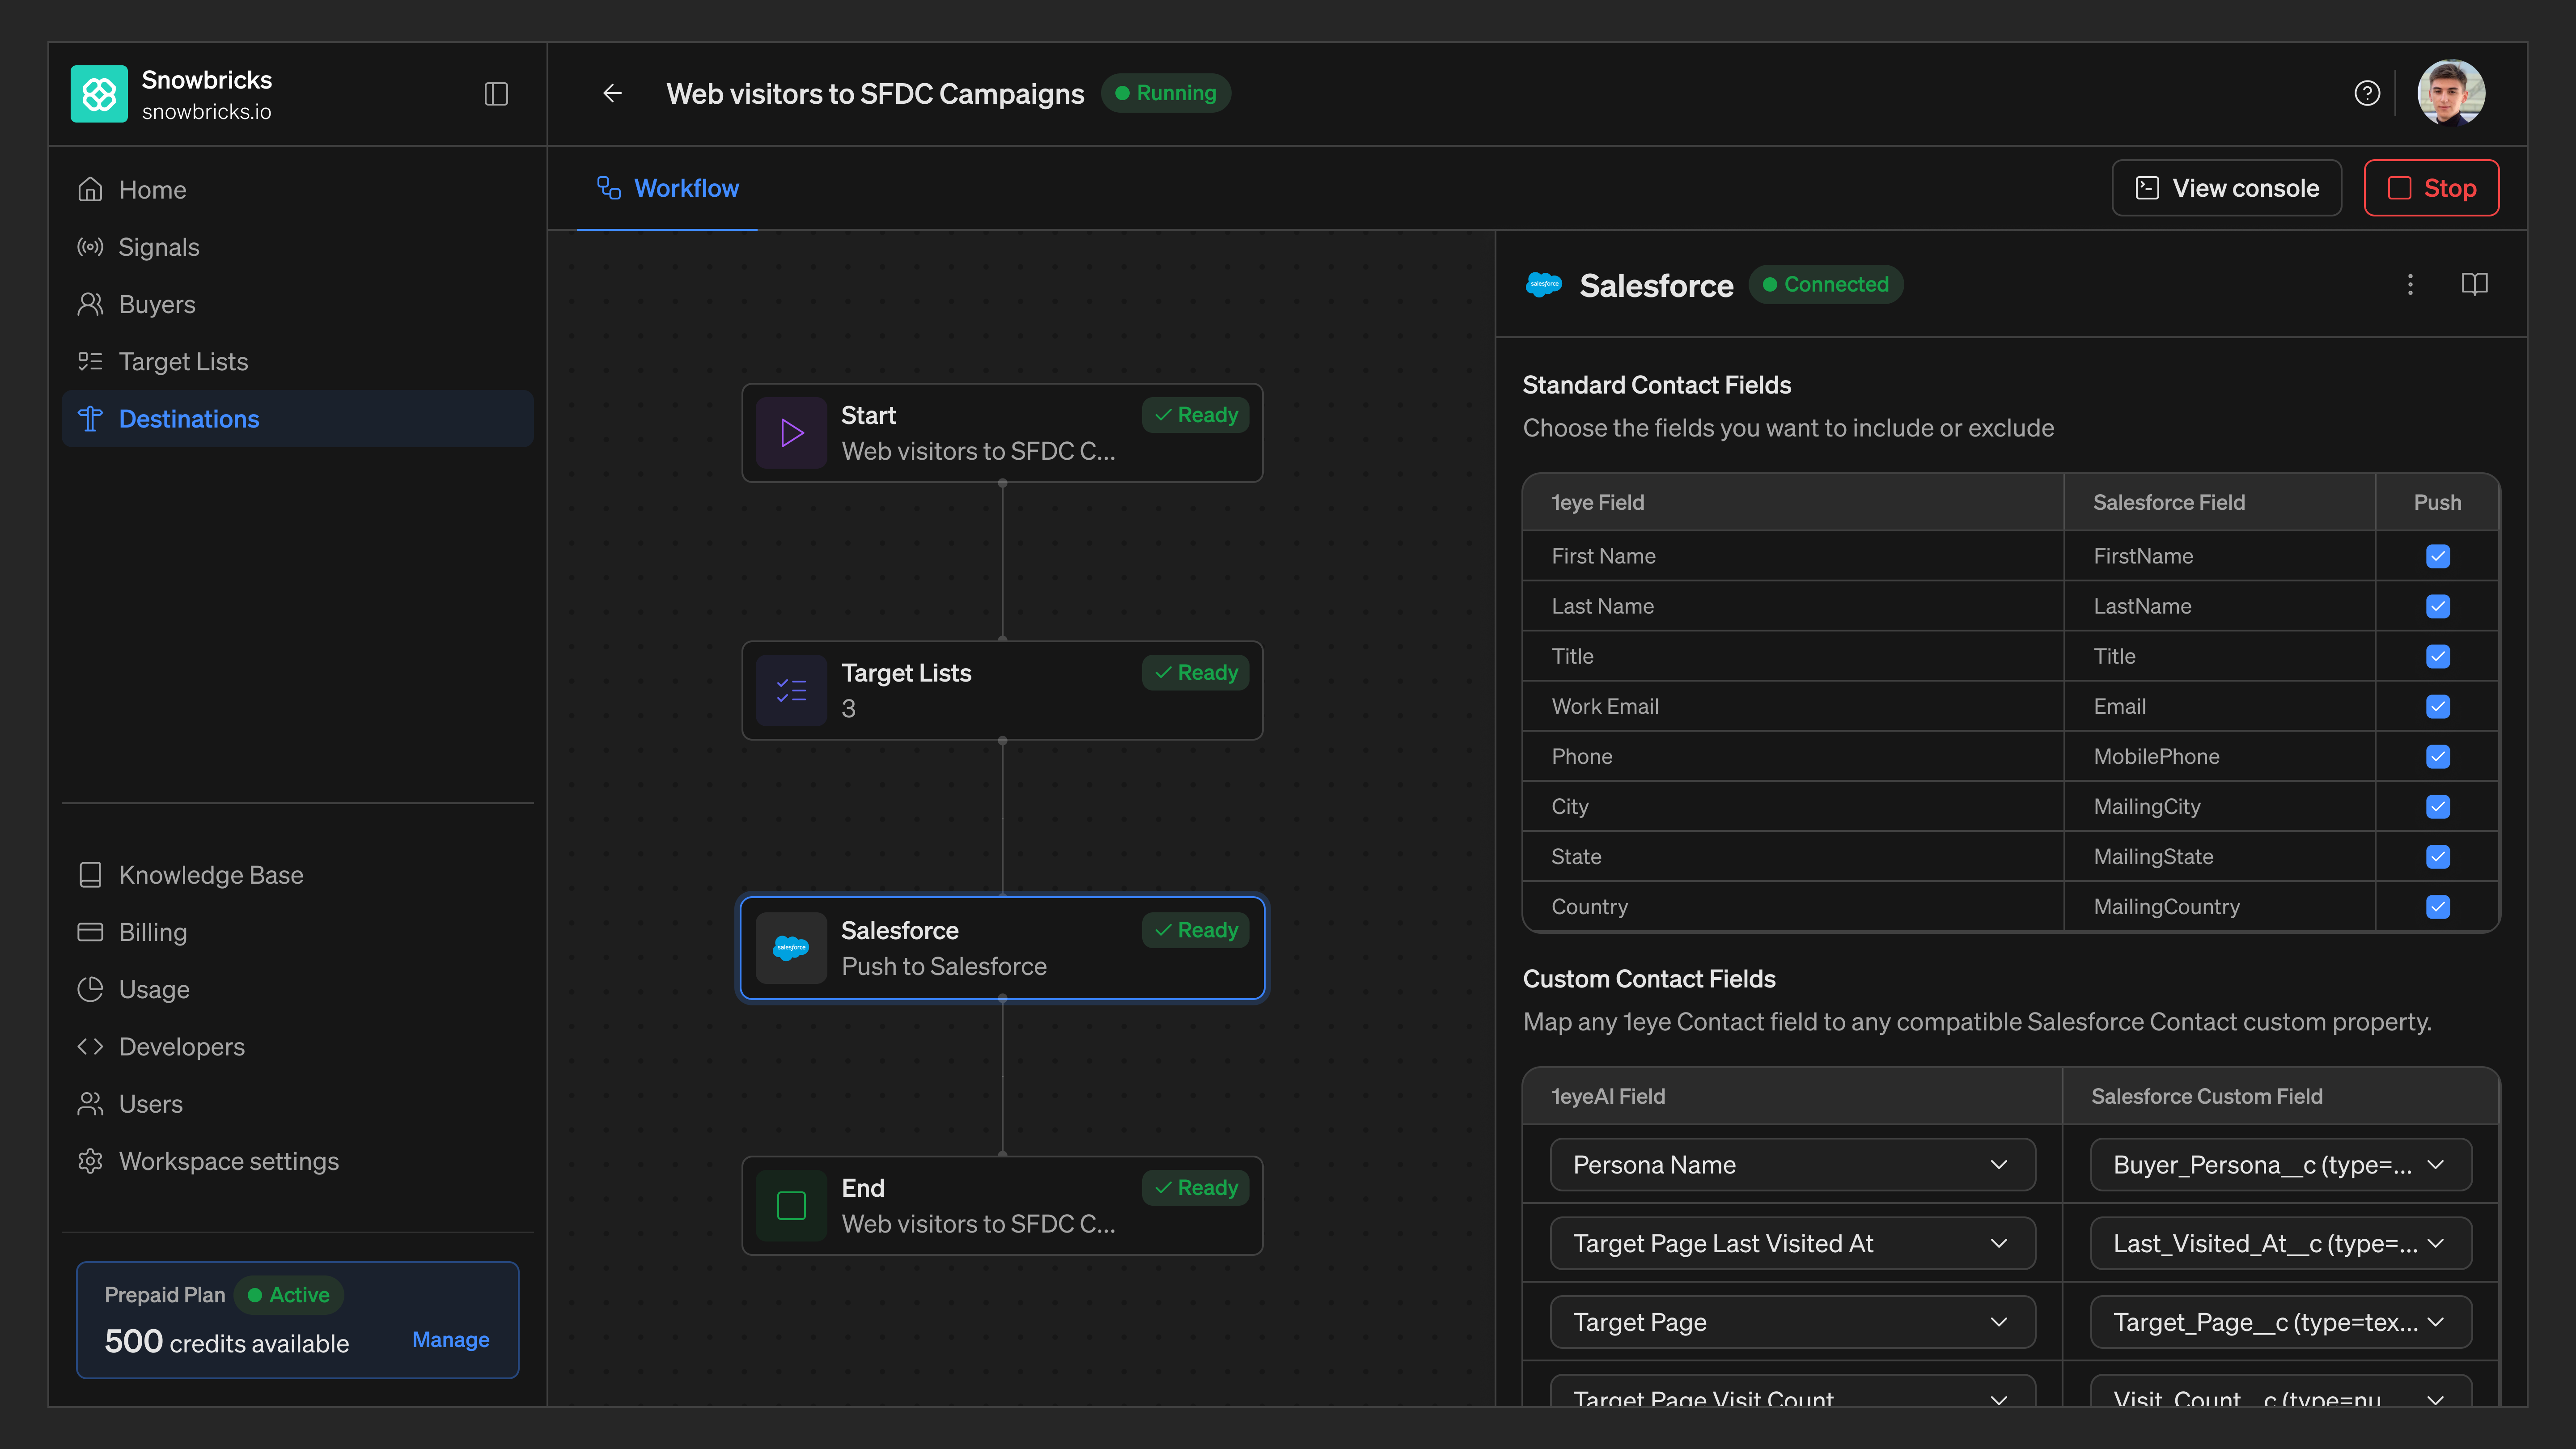
Field mapping
Mapping is organized into four sections — Standard Contact Fields, Custom Contact Fields, Standard Company Fields, and Custom Company Fields. Each standard field has a Push checkbox — uncheck it if you don’t want that field sent to Salesforce. Standard Contact Fields (example):
Custom Contact Fields — push activity data that doesn’t exist as a standard Salesforce field:
Select + Add more to map additional custom fields.
Standard / Custom Company Fields work the same way, for company-level data (industry, description, employee count, revenue, address, and any custom company field).
Select Save Destination once your mapping is set.
Monitor pushed records
From the Console, filter Salesforce pushes by All / Pushed / Pending / Failed. Select a contact to see the exact payload sent to Salesforce — contact fields and associated company fields together.Disconnect Salesforce
- Open the workflow and select the Destination node
- Select the menu next to the Connected status
- Select Disconnect
Best practices
Connect with an account that has the right permissions Use a Salesforce login with admin or app-authorization rights, so the connection doesn’t get blocked by a permissions gap. Review the permissions screen before allowing access Know what you’re granting 1eyeᴬᴵ access to before you select Allow. Map required fields first Make sure fields Salesforce requires (like Last Name) are mapped and populated before pushing, so records don’t get stuck in Pending. Re-authenticate if the connection breaks If Salesforce revokes access (password change, admin policy, expired token), reconnect from the Destination node.Troubleshooting
FAQ
Does 1eyeᴬᴵ see my Salesforce password?
Does 1eyeᴬᴵ see my Salesforce password?
No. Salesforce login happens on Salesforce’s own hosted page. 1eyeᴬᴵ never sees your username or password — only the access token Salesforce issues after you approve the connection.
What happens if I disconnect Salesforce?
What happens if I disconnect Salesforce?
Workflows using Salesforce as a destination stop pushing until you reconnect. Records already pushed to Salesforce remain there.
Can I edit field mapping after a workflow has started running?
Can I edit field mapping after a workflow has started running?
Yes. Open the Destination node, update your mapping, and save. New pushes will use the updated mapping.